Home /
Archive for July 2016

New recipe that I promised a while ago, easy, flavorful, can be used as a spaghetti sauce on raw noodle replacers, or on cooked noodles, spaghetti squash, on fish, or just as a dip. My son uses it on his sandwiches to replace mayo or other condiments, just don't heat it up or you lose all the valuable nutrients. As always pictures follow.
Here's to good and healthy eating!
Vegan Vegetable Slather:
Ingredients
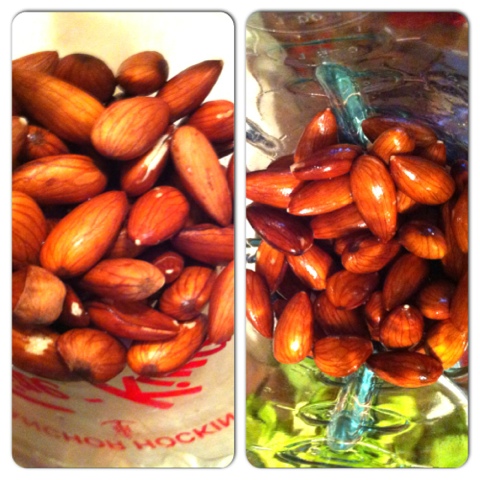
-1 1/2 C raw almonds soaked overnight and drained then rinsed very well.
-1/2 C cheezie sprinkles (recipe follows)
-1 tomato, chopped
-1 red pepper, seeded and chopped
-1-2 stalks of celery with leaves if possible, use only one stalk if you don't like too strong a taste of celery. Throw out stringy peelings.
-2 cloves of garlic
-1 small bunch of scallion( 2-4 stalks)
-4-6 leaves fresh basil
-3/4- 1 C water
-1/4 C EVOO (extra virgin olive oil)
-1 C ground almonds
-2 TBSP nutritional yeast
-2 TBSP Miso
-1 tsp lemon zest
Method:
-Peel celery, place all ingredients in a blender on high speed and liquefy. Refrigerate for at least 4-5 hours before using. Keeps 4-5 days in fridge.
Freezes very well, keeps up to 2 months in freezer.
 The Dalek is because I have been dealing with some no see ums (biting black gnats or biting midges) and I may have been screeching, Exterminate! Exterminate! Exterminate! They were accidentally brought in on my yoga pants a few weeks back when I lay down in the grass early one morning, while on my walk. It was because I had some sciatic pain and needed to lie down immediately to stretch the pain away, so I could walk again. I am allergic to grass and thought nothing of it when I felt a bit itchy, until the biting began. Aaaaah! Help me!!! I jumped off that grass so fast and ran all the way home like one of the little piggies, and I cried wolf to my beloved. Poppa Bear informed me that they were most likely chiggers. Whaaaaaa? Never heard of this before. And so our sordid tale of gnat mischief begins, you see I thought I was going a bit bonkers for the last 3 weeks or so because I could swear something was biting my ankles, my feet, my legs, especially at night and in the later part of the day around 5pm. I also woke up with bites on my neck, ears, breast,(poppa bear was not happy, something about not sharing- teehee) and my head was super itchy. Problem was I could never find or see a dang thing. Lo and behold, I finally come across the culprit this past week when I felt a bite, I had a flashlight in hand by chance and scoped out the situation. Little creep flew off when I shone the light but I finally saw the minuscule wanker. I went crazy cleaning, researching, getting bug products, keeping the a/c on as cold as possible, washing all bedding every day, and mothball bagging all clothes, yarn, and anything else that had soft egg layable home material. Plus we have been keeping bleach poured down sinks before bed to kill eggs, it's helping but I just want them to go away now. I must say that we are very lucky because I caught it pretty early, I have read some awful stories. So, needless to say, when I got an invite to escape out to the country, I seized it. Exchange my no see ums bugs for mosquitoes, flies, and all the glories of nature. It was beautiful and exactly what the doctor ordered. See for yourself:
 The cow saw me, she totally caught me taking pics of the geese and the pasture.I happened to get away on a beautiful long weekend, seriously hot but when you are out in the country, the nights cool down and it's perfect for sleeping; and because you are so busy during the day, the heat does not bother as much. Because of my allergies, I am the kind of guest that brings food. Often I prefer to make a whole meal for a small set of people and breakfast too. It makes it easier on the hosts, it's safer for my health, let's me put my Chef talents to proper use, and nobody has to cook after traveling. It's winner winner and yup, I made chicken dinner! I tested Jamie Oliver's milk chicken recipe with dairy-free variations and an Asian spice twist. I forgot to take pic of the finished product but man was it yum scrum!
  Here's the link to the original and after the link, are my variations to it because I can not do any dairy except a bit of butter. http://www.jamieoliver.com/recipes/chicken-recipes/chicken-in-milk/Coconut Milk Chicken with Asian Spice Mix Variation Information:Follow Jamie Oliver's Directions but substitute 4 C of coconut milk for his milk, a spice bag with 2 star anise, 1 cinnamon stick, 4 whole allspice, 2 sprigs fresh time, 1 bay leaf, 3 whole black cardamom, 2 sticks licorice, and 1 kefir lime leaf. I also only used 1 lemon, black fresh cracked pepper, 4 cloves garlic with skin, 1 clove garlic crushed and added to milk, and kosher salt for my recipe. I also used 3 chicken legs with thigh on and a pack of 8 chicken thighs only because I wanted more pieces as I was feeding more people and wanted left overs. I did not use any sage in the variation.Most importantly for me though, was how I left the lid on our Le Creuset dutch oven for 30 minutes and then removed the lid for the last 60 minutes. The reason for doing it this way is because I like a good amount of sauce and I wanted to keep more of it to pour over the sides I made. I served this with basmati rice for the others, mashed sweet potatoes for me and umeboshi cabbage. I will give that recipe a wiz another day on this blog. As I stated earlier, it was a last minute invite and I had to prepare, cook, and pack, in a few hours so pictures were not priority.Here is Jamie Oliver's finished recipe pic and honestly? WOWZA!:
  Next morning we had Crêpes with Strawberry Rhubarb Compote, my friends mother loved that compote, I like that it's made with no refined sugars and that it's chunky. I thought I might be alone in my preference for these things but it turns out I was delightfully mistaken. The compote will be sold on Etsy as one of Bien Confit! Gluten free Paleo offerings.When brekkie was done we headed out to my friend Lady T's brothers farm. It's actually a horse/cat rescue farm, that is home to 11 Arabian beauties, kitties, and other assorted furry friends. I had such a blast, I love love love the country. I pray that God gives Poppa Bear and I the opportunity to live out there because this city mouse thrives in that kind of environment. It's so much better than city life, harder yes, and a lot of work but the pace and people are just delightful. Here's some pics I took, I blocked out lady T's face because I didn't ask her if she was OK with her pic being shown here.The first is looking out from the barn to where we needed to walk to reach the horses that were loose and making trails in the wooded areas.
 This guy was so enamored with Lady T, he was a total rub love suck, check out the next pic after this one below. His eyes were all googoo.
  What you don't get to see is that the family dog, which is still a playful pup, does not get along with this guy so he barks incessantly to annoy him. Seconds later he'd had enough and bucked his head on the wood slats to warn the dog off. Dog shut up and scampered off ASAP. Hilarious!
 I touched a horse up close for the first time! I was a bit nervous because it's a big animal and I wasn't sure what they liked or didn't like. Dogs are more my speed for behavioral understanding but it was just lovely, the horses were so gorgeous and calm.
  Apologies for the blur but there was a lot of hoof movement and we were warned to not get under foot. I was so excited, I had a hard time staying calm. Big kid in a candy store, seriously, how could someone want to hurt these animals or put them on a plate to eat?
 That big guy was a Clydsdale mix and he ran the show. He was all like, "Rub me first as I am too sexy to be ignored." Naaah, he was a perfect gentleman and the horses waited their turns with one or two being a bit more insistent for attention than the others. They were all trying to cope with the heat and keep flies away, horses don't like bugs much either. I wish the camera could convey the intensity of their gorgeous coats better.
 This guy was so sweet, look at that cute punim, he put his face super close because he wanted me to rub him in between munching breaks. I keep giggling when I see that picture because he was so up in my face but adorable too.
 Nat and Mat with their son Ben are doing a wonderful thing at this horse rescue, these animals would have ended up on a dinner plate if she had not been there to intervene; give them this wonderful place to rest, roam, and have a chance at a great life. It's so much hard work, Lady T and I want to help them, we're going to get a site up for them with loads of sponsorship & Patreon info, vids, come meet the horses opportunities, so people like you reading this blog can help them and save these magnificent beauties. There are 2 sponsors for the horses as I write this and a new sponsor arrived yesterday for one of the horses as we were leaving, which is such a great help. This family is totally committed to giving these horses love and a high quality of life, it's just an expensive and demanding undertaking, which they handle with such kindness and grace. God bless them. What I love most about this farm is that they raise bee's, and they collect the honey themselves, which they sell to support the care and needs of these animals they shelter. The honey is all organic, wildflower, raw, and pure liquid gold; how God intended it to be. I have had organic honey before but not raw honey, and as a Chef I was thoroughly impressed with the quality of this product. It tasted like it was right off the comb, that luscious, clean, sweet, floral, bee's wax deliciousness all mingled into super duper awesomness! Check it out:
 These below are going to be the more fancy bottles that will be great for gift giving, I will link info and do a special blog post for them if anyone reading is interested in helping to support their cause.
 Lastly, we went to Petch Orchards and got these fresh Zatar apples. O-M-G!!!! Such a delicious apple, it's a bit early in the season to go apple picking but that's on my fall to do list which I will blog post when the chill starts to gently come in and nip my nose. For now you can enjoy the sexy red and yellow streaks of this luscious, slightly tart, crisp, not too dense, and brown sugar, juicy sweet apple. You gotta support your local farmers and try to get some apples. Leave your comments down below and if you are interested in sponsoring a horse now or want to buy some honey, let me know. I would really love to hear from you!
 Good day one & all!Today I am sharing some Peppered Ginger Beef stir fry and an Apple Galette that I tried to make with another blogger's dough recipe, which was leftover from making pumpkin pies. If you are not familiar with Apple Galette, it is a rustic style apple pie that does not get baked baked in a traditional pie pan. It's actually a perfect pie for beginning baker's as it requires very little skill, is not highly stylized with special cutouts or crimping, and is beautiful when finished baking. See for yourself:
  Just scroll down below if you only want the pie recipe.We were at the health food store recently and in the freezer there was organic beef on special, we got a few items, I am not a big beef person. Having been a vegetarian for so many years, macrobiotic, raw vegan, and hyper aware of how poorly these animals are all too often treated, I veer away most times. Since my difficulties with my thyroid, low iron and calcium, along with some other stuff, I do on occasion, indulge. It often requires a few digestive enzymes, as I struggle to digest red meat, and I usually add a lot of heavy seasonings and marinades to cover the beefy taste.Honestly, I prefer poultry and fish.This recipe is very quick when it comes to cooking, it's a high-heat stir fry, as such, I seriously recommend three very important things before you make it.1-Read through the ENTIRE recipe & instructions twice before you begin and keep the recipe close at hand when you are making it.2-Have all the ingredients ready and near by before you start cooking. Chef's, call this advanced ingredient prep, Mise-en-Place. It means all items in place (at the ready to begin).3-No distractions when cooking, you cannot be on a phone call, handling a baby, scrolling through social media, answering the door, etc. This recipe cooks in 5 1/2 minutes, yup, that fast. The meat cut for this is usually tender and over cooking will create a seriously tough end product.
 PEPPERED GINGER BEEF STIR FRYIngredients:3-4 Lbs Organic Beef Stir fry steak pieces, cut in strips (Ours was pre-cut)1/4 Cup Organic gluten-free Tamari1 tsp Toasted sesame oil2 Tbsp Organic Sesame oil1 Tbsp Fresh ground black pepper1 1/2 Tbsp Fresh grated ginger1 Clove garlic crushed1 Onion chopped1 Yellow or Orange pepper chopped1 Bunch scallion aka green spring onion, cut thinly on an angle 2 Cups Rich beef stock, (I make my own and reduce it by half by cooking it down, if you need a recipe, click on the link after the recipe & pictures, down below.)3 Tbsp Tapioca starch mixed with some beef stock to form a thick pasteMethod:-In a bowl place beef that has been patted down with paper towels to remove excess moisture & blood-Add to beef the Tamari, 1/2 tsp toasted sesame oil, pepper & ginger. Allow to marinade, covered in the fridge for 30 minutes. (Not longer or it will become way too salty.)-Once the beef is ready, in a pan, heat the remaining oils, on a medium high heat cook the onions for 1 minute.-Add beef and stir, after 1 minute of cooking, add garlic, stir to keep from burning, cook 1 minute. Remove to a bowl to add back once the peppers are cooked.-Working quickly, add peppers and remaining ginger, cook- stir constantly for 1 minute, add beef back in.-Add beef stock and heat through for 1 minute then pour in the tapioca mixture, you must stir quickly to make sure it thickens throughout the whole dish and does not get lumps. Cook 30 seconds and remove from heat.-Serve over steamed rice and sprinkle with the scallions just before serving. Feel free to add any other vegetables of choice as an extra side dish if you like.

 Now we move onto the dessert, as I said earlier, this is not my pie crust recipe but it did the trick. It was not a crisp shell, it had more of that flakiness to it.Here is the link to the blog, Flippin' Delicious, where the crust originates from:http://flippindelicious.com/2014/11/best-all-butter-gluten-free-pie-crust-pastry.html
When I make apple pie, I NEVER use packaged pie filling. That would be sacrilege, no touchie!The only canned pie filling I use, in a serious pinch, is cherry and that's because out of season cherries are expensive and unavailable. Besides, apple pie filling is really not expensive or difficult and you get such a great tasting product from it, you really need to give it a whorl, I must insist that you bake it with loads of love though. It makes a difference, trust me.APPLE PIE FILLING FOR GALETTEIngredients:5 Granny Smith Apples (They hold up better when baking)1 1/2 tsp Ground cinnamon1/2 tsp Ground NutmegPinch of ground clove1/4 Cup REAL apple juice (The brown one, sometimes called apple cider-no alcohol)1 Tbsp Tapioca starch mixed with some apple juice to form a paste3 Tbsp Grade B maple syrup1 Tbsp Organic coconut sugar1 tsp Vanilla extract 1/4 Cup cold salted butter1 Egg mixed with 1 Tbsp milk of choice or waterMethod:Preheat oven to 350 degrees F-In a bowl mix together apples, cinnamon, nutmeg, clove, maple syrup, vanilla, maple syrup and coconut sugar.-*In a non-reactive sauce pan, place apple mixture with apple juice. Heat on medium heat and cook for 5 minutes, you don't want mushy apples, just slightly cooked. Then add tapioca mixture and remove from heat while stirring constantly until it thickens. Leave to cool.-Between two sheets of parchment paper roll out your dough large enough to accomodate your filling and to 1/2" thickness. Gently remove the top layer of parchment, you can use the bottom layer as parchment to line your sheet for baking.-Place the dough on a parchment lined cookie sheet that has lipped edges to catch any juices that may run.-Chill in freezer for 4 minutes.-Remove from freezer and dot with a few chunks of butter, place apple filling over the butter and in the center of the galette. Some of the juice will run, do not panic, this is normal.-Quickly dot more butter over the apples and begin to carefully fold in and upwards, the edges of the pastry crust. You fold one part over the next as if closing a sectioned envelope.-Place the last of the butter on top, then using the egg and a pastry brush, run the egg wash over the outside of the crust to help with browning. You may sprinkle it with a bit of coconut sugar or cane sugar if you like. I only used the egg wash.-Bake in your preheated oven for 45-60 minutes until it is a nice golden brown.*If you look at my pictures below, I did not cook my apples in the sauce pan before, I placed them directly in the crust after they were well seasoned up and I had also added the apple juice and tapioca to that mixture before. The reason is, that I am a weirdo and like my apples to be super firm when I eat pie, I am not a fan of apple mush. This means the apples are not as soft as the average person is used to and people who don't like it that way will complain. I think it's leftovers from my Rawfood vegan days, I am used to a snap in my fruit when I bite. If you prefer a more solid apple bite, the Granny Smith's will give that, which is the reason I choose them over red apples like a McIntosh. However, if you want a serious apple bite with a slightly harder texture, then you can make it my way but I suggest cooking it a bit longer so the apples are softer and halfway through, lower the temperature to 325 degrees so you don't burn the crust. Otherwise, follow the original recipe if this is all too much for you.  Here you can see the simple folding process.
 This is how beautifully she turned out when she was finished baking.
 So scrumptious, nothing says comfort like a wonderful piece of apple pie.
  I hope you liked this post, please ask any questions you like and leave comments down below. I like to hear from you and know how your kitchen adventures turn out. Don't forget to subscribe!