Bonjour sweetlings'!
Today is covering a very basic, good to know-how, water bath canning method for those end-of-summer, ripe, tasty, tomatoes.
Last summer, when I participated in some open summer markets, I got into a very serious discussion with a man about saving summer fresh tomatoes, so you could enjoy them all year round.
I confessed to being a canning newb in this department but did have two cases of Quebec field tomatoes that I was not sure what to do with.
Well, said Monsieur had loads to tell and thus began a very lively back & forth, with other market goers chiming in, about water bath canning methods, levels of acidity, and the joys of opening fresh summer tasting tomatoes in freezing cold January.
Say no more, I told the man, I am sold!
Truthfully, that winter fresh tomato bit totes had me, and I decided to go home and do the do. Then I hit a little snag in the best of intentions world.
Turns out that the tomatoes were way too delicious and we ate 40 lbs in two weeks! Okay, we did share some, dehydrate some, but honestly, it was a tomato food fest. Everything from bruschetta, soup, roasting, stews, and humble sandwiches, managed to put such a significant dent in those 40lbs, that there were not enough left to can. Wah wah...

This year, I promised would be different and it has been. I have managed to buy a 20 lb case of Québec field tomatoes at the darling price of $9 and have canned 80% of them. The rest I am making homemade ketchup with and indulging in the occasional tomato sandwich-eureka! Sounds like a perfect lunch idea for today. Hehheh.
Before I launch into the how to, I am including two simple charts, (one from the university of Minnesota, the other from https://realfoodrn.com/using-scobys-to-balance-garden-ph/ ) that show the acidity of items one often uses in canning, and the affinity forplant ph preferences in the garden.
Why are acidity levels important?
Good question. Harmful bacteria, that can be deadly to us humans, cannot thrive in acidic environments. It is important to use acid to neutralize dangerous stuff like botulism, which loves sitting in an anaerobic (zero oxygen) environment, which we so kindly provide when canning. Adding acid to food stuffs when canning, ensures safety, brightness of colour, and helps maintain freshness along with flavour; all a boon for intrepid canners!
I can already hear the question tumbling in your heads, but aren't tomatoes really acidic?
Another great question! Though tomatoes may seem very high acid foods, their ph levels fall into a lower acid plane, thus making the addition of acid a necessity. This is easily rectified by using something as simple as lemon juice. see the charts and then continue below for the process, it is the perfect time as these summer beauties are on their way out.


So, first step is getting the most beautiful, fresh, ripe, not rotting, tomatoes you can. I always recommend farmer's markets at this time of year for solid reasons.
1-Support local farmers, as a consumer, where you choose to spend your dollars speaks volumes as to the kind of world you want to live in and leave for the next generation.
2-Local farmers have more genetic diversity in their crops because many use heirloom seeds and organic farming practices, this means a greater variety along with less GMO's to make you and yours, along with our bee populations sick. SAVE THE BEES!
3-You cut out the middle man, it is coming in straight from the fields, usually the same day and heads directly to the shelves. Farm to table is the way to go.
4-Freshness and variety along with early morning get-go, on your part, means greater quality beginning and end product for you and your loved one's. See #3 if you need further clarification.
5-It is a vibrant, fresh, and aliveness that you will never find in mass produced grocery store holdings. Believe me when I tell you, a good farmers market, will have you feeling so good!
6-It is a perfect time for a family outing, this is a teachable moment for old and young alike. I find new things whenever I go to the market, most recently, a very cool eggplant, that was round, hails from Italy, and contains loads less water; making it perfect for grilling and pickling!
7-As a professionally trained Chef, we know quality is greater than quantity, however, when nature's bounty has arrived, trust me, at the farmers market you WILL find both & for fabulous prices!
Here are the loverly tomatoes we have had this season, please keep in mind that field tomatoes are not perfect or always uniformly "pretty", in the grocery store sense. That is what you want, the tomatoes you are getting will taste better than hothouse one's and will prevent perfectly good produce from ending up in land-fills, contributing to methane gas emissions and thus the demise of our planet. Lower your expectations for the outside looks and learn to appreciate touch, smell, taste, and inner beauty. You really cannot judge a book or tomato by it's cover!
Prep your mason jars and lids, by washing them well, making sure you have enough of jars, seal lids, and screw tops. Then fill a canning pot with water to 3/4 full, in a jar basket, place in your mason jars that need to be filled with water too, add more if need be but be careful because too much will boil over. Turn head to medium high, bring up to boil and turn off immediately, while still hot, after about 15 minutes, place the snap lids in the water. This will ensure no bacteria but will not melt the seal part to the snap lid, that you need. At this point, I make sure I am ready for all the steps to come, I prep a large baking tray with a dishtowel, have my ladle, canning funnel, iar removal spatula, snap lid, magnetic wand grabber, and bowls, all good to go.
Now, onto tomatoes.
You need to thoroughly wash your tomatoes, no dirt must remain as this can be a botulism home. Once washed, get a large stock pot of water boiling, score an X (not too deep) on the bum of the tomatoes. You will need a large bowl with lots of ice-cubes and more ice-cubes at the ready. This is to quickly cool the tomatoes upon removal, so they do not keep cooking. I buy a large bag of ice at the corner store to be safe.
Once your water is boiling, add 4-5 tomatoes at a time to the water, carefully, depending on size. We had some that were huge, I did 2-3 at a time. Leave in for 30-45 seconds. Remove using a slotted spoon, and place immediately in the ice water bath bowl. Leave in there for about 1-2 minutes, the skin will start to peel off. That is a good thing that you want!
Once you have done this, peel all the skin off of the tomatoes, (I keep these skins and either freeze them for making tomato jelly or ketchup at a later date, they hold loads of flavour)
Next, you will begin to slice, then chop your tomatoes that no longer have their skins, into medium to large dice, depending on what you use them for.
Once you have packed the tomatoes and added lemon juice, clean the rims and sides, add the snap lids, and add the rings. Screw the rings finger tight aka snug but not tightened. Should you need to see an easy breakdown pic, see below from pickyourown.org.
This simple picture, step by step guide, comes from:
http://www.pickyourown.org/water_bath_canning_directions.php

Now that all is ready, it is time to place your filled mason jars back in their basket and put the water back on to boil. I bring it up to a boil, reduce to high heat, and allow to process for 15 minutes. Then you remove them CAREFULLY, from the water, place on your cloth lined tray, and allow to cool. The lids will make a POP popping sound and the lids will be sucked in in the middle. That means you got a seal and these jars will last 1 year in a cool, dark place. If this does not happen, you must not leave these on a shelf. Place them in the fridge, and eat them within 1 month. Alternatively, you can remove the snap lid, try using a new one, make sure the jars are not over filled, and process them once more.

On the right is the jar waiting to be processed, and on the left is a jar that has already been processed. There will be some colour change, this is normal.
Do not forget to label what is inside, along with the date and year. This is important to prevent spoilage and to know what is in your pantry, when you go to use your canned items 4 months from now.
My total tomato haul= 2x20 Lbs tomatoes, used about 1 case for a variety of stuff. Canned 1x 20Lbs=
3x 1 L jars
12x 250ML jars
6x 125ML jars
I highly recommend researching properly and buying or borrowing from a library, some small batch canning books or food preservation books. I am constantly learning and there are many wonderful resources available to you, take advantage!
I am only offering tips on water bath canning methods for mow, as I do not yet own a pressure canner. If you would like to learn more about pressure canning, please click on the links below. I am including a link to buy a pressure canner, which is supposed to be some good one's; I myself am eyeing the 30 Qt all American model. Remember a pressure canner is what you want, not the same as a pressure cooker at all!

http://www.simplycanning.com/pressure-canners.html
Thanks so much for stopping by, leave any questions down below, I love to hear from you. Don't forget to subscribe & happy canning!
https://www.attainable-sustainable.net/pressure-canning/
https://survivallife.com/canning-jar-guide/


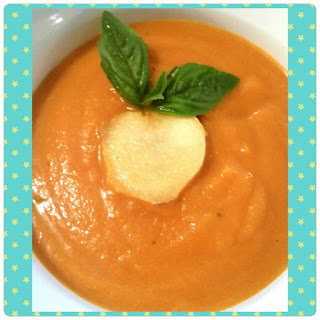
 VEGAN CARROT GINGER AND COCONUT SOUP:


